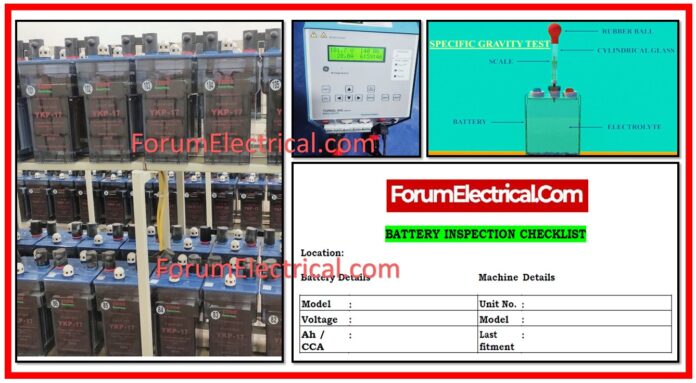
Battery inspections are essential for ensuring the longevity and effective operation of electrical systems, particularly in industrial & commercial hardware.
Regular inspections help to prevent unexpected failures, decrease downtime, and ensure the battery runs at its full capacity.
This checklist provides a detailed guide for inspecting, testing, & servicing batteries placed in machines.
The following is a complete approach for visual & technical battery inspection.
Battery & Machine Information
Before starting the inspection, record the necessary information to identify the battery & its accompanying machinery:
Battery Details
Record the battery’s model.
- Voltage: Take note of the battery’s voltage rating.
- Ah/CCA: Display the battery’s capacity in ampere-hours (Ah) or cold-cranking amps (CCA).
Machine Details
Unit Number: Write down the machine unit number in which the battery is placed.
Note the machine’s model.
Last Fitment Date: Mention the date that the battery was last installed in the machine.
Visual Inspection
The first level of inspection involves a thorough visual examination of the battery’s physical condition.
This step checks for any mechanical or structural faults that could hinder performance. Mark “OK,” “Not OK,” or “N/A” in the appropriate boxes for each point.
- Make sure the battery is properly placed and that the bracket is not damaged or corroded.
- Check the battery box (also known as the battery case) for fractures, distortion, or damage.
- Check that the battery guard cover is intact and appropriately covering the battery.
- Ensure that the poles are in good shape, with no excessive wear or corrosion.
- Make sure the ventilation holes are clear and the battery vent caps are in place to allow adequate gas release.
- For non-sealed batteries, make sure the electrolyte levels are within the acceptable range.
- Check for apparent damage or warping in the battery’s interior cells.
- Check for evidence of corrosion, damage, or poor connections.
- Check that both the positive & negative cables are in good shape, firmly attached, and free of wear and corrosion.
Technical Inspection
The second phase includes technical examination of the batteries with specialized tools such as a hydrometer, voltmeter, and multimeter.
These tests are critical for determining the battery’s performance in a variety of scenarios.
- Specific Gravity of Electrolytes (Hydrometer Test): Using a hydrometer, determine the specific gravity of the electrolyte. The typical acceptable range is 1.220 to 1.270.
- Alternator Voltage (Engine operating): Check the voltage output of the alternator when the engine is operating. The usual range is between 25.5V and 28.5V DC.
- Battery Voltage (Unloaded, Engine Running): Measure the battery voltage while the engine is running and there is no load applied. The predicted voltage range is 25.5V to 28.5V DC.
- Battery Voltage (Fully Loaded, Engine Running): When the engine is fully loaded, the battery voltage should range from 25V to 27V DC.
- Battery Voltage (Engine Off): Measure the battery voltage while the engine is turned off. The overall battery voltage should be approximately 25.2 V DC.
- Discurrent or Case Drain Check: Check for discurrent or case drains using a multimeter with a 35mA setting. The reading should be less than 20 mA.
- Battery Load Test: Perform a load test by providing a 200A load for 10-15 seconds. The voltage per battery should not fall below 9.6 V DC.
- Open/Short Circuit Check: Make sure the battery system has no open or short circuits.
Actionable Recommendations
According to the inspection results, follow these recommendations:
Battery Replacement
If visual inspections reveal severe damage (Points 2, 4, or 7), or if the load test voltage falls below 6.5V DC or 300A, replace the battery.
Battery Recharging
If all visual inspection points pass, but the load test falls between 6.5V DC and 9.6V DC, the battery should be recharged.
Regular battery inspections assist to ensure optimal performance & safety. Following this checklist makes sure that all important components are evaluated and any necessary steps are performed to keep the system operational.


