
This method statement outlines an organized procedure for safely and efficiently installing switch boxes and electrical outlets.
Proper installation guarantees that the system operates reliably complies with safety rules and meets industrial standards.
The procedure comprises all actions from site preparation to final testing with the objective of minimizing the risk of accidents, electrical faults and equipment damage.
Purpose
This method statement outlines the steps required for the secure and effective installation of switch boxes & sockets.
Its objective is to verify compliance with safety laws and manufacturer instructions reducing hazards to persons & property throughout electrical installation.
Scope
This procedure covers the installation of switch boxes and sockets which includes preparing the installation location, mounting, wiring, connecting, testing and commissioning electrical circuits.
Labor Requirement
The following personnel are needed:
- Site Engineer- 1
- Supervisors – 2
- Safety Officer
- Quality Inspector
- Administrative Staff
- Fitters
- Electricians
- Helpers
Equipment & Materials Requirement
- Switch boxes and sockets
- Mounting brackets and hardware
- Electrical wires and conduits
- Wire Connectors
- Screwdrivers, pliers and hand tools
- Voltage tester or multimeter
- Personal Protective Equipment (PPE) includes gloves, safety glasses and safety shoes.
Responsibility
Project Manager: Responsible for overall supervision as well as assuring safety and compliance.
Electricians / Qualified Personnel: Installing, wiring and connecting switch boxes and sockets.
Supervisors: Supervisors are responsible for ensuring that method statements and quality requirements are followed.
Precautions and Safety Measures
Wear adequate PPE during installation.
Turn off the electricity at the main panel before beginning work.
Handle all electrical components with caution and avoid making direct contact with bare conductors.
Follow your local electrical codes & manufacturer’s guidelines.
Procedure
Step 1: Pre-Fixing Preparation

Check electrical plans to determine switch box & socket positions.
Make sure the power is switched off at the main electrical panel.
Inspect the installation location for potential risks and impediments.
Gather all essential tools, materials and personal protective equipment (PPE).
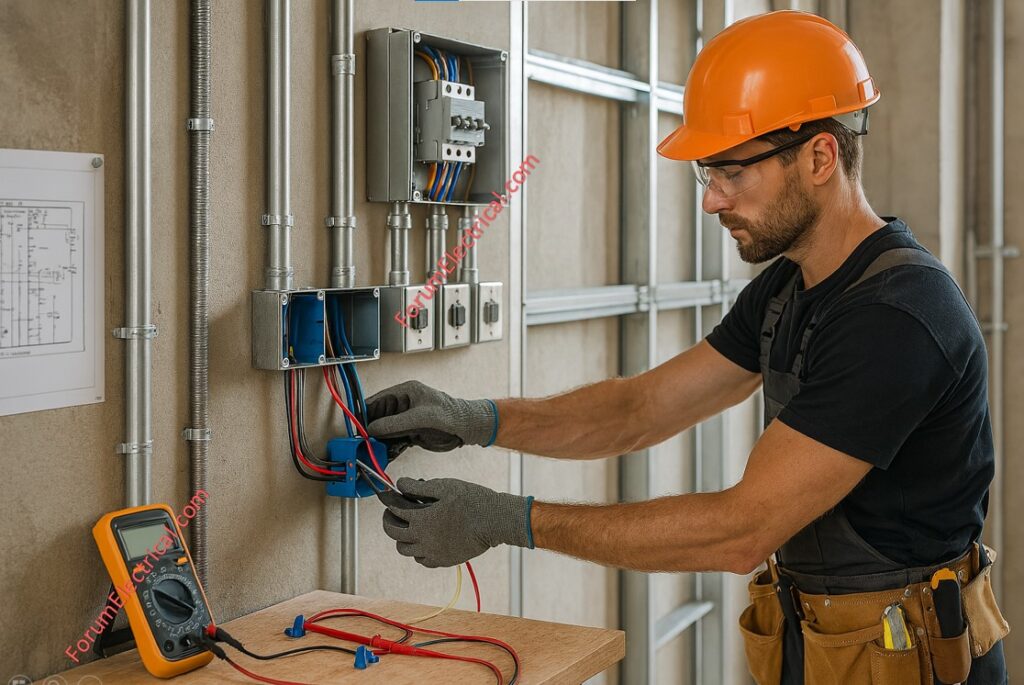
Step 2: Mounting and Wiring
Select areas based on electricity plans.
Install mounting brackets (or) hardware securely and line them properly.
Connect electrical wire and conduit from the power supply to the switch boxes and plugs.
Connect the wire to the terminals, providing correct identification and organization.
Check connections with a voltage tester (or) multimeter to ensure no current flow.
Step 3: Fixing and Connection
Attach switch boxes and plugs to mounted brackets ensuring a level and secure installation.
Connect circuits to the correct terminals using local codes.
Label each circuit so that it may be easily identified.
Check each switch & socket for functionality and continuity.

Step 4: Testing and Commissioning
Restore electricity to the main electrical panel.
Check each switch and socket to ensure that all connected devices are working properly.
Check for loose connections, overheating and fault components.
Conduct a final check to ensure that the installation satisfies specifications.

Documentation
Keep a record of installation data, testing results and observations.
Keep a record of issues & corrective actions for quality assurance.
Template
Summary
A safe, dependable and functional electrical system is accomplished by installing switch boxes and sockets according to this method statement.
This procedure ensures operating efficiency, reduces hazards & meets industry standards. Regular inspections, testing & documentation ensure system operation and safety after installation.
